
Is there a flash on the iPad? Iblazr is an additional flash for iPhone. Lens from Lensbaby

Like AssistiveTouch, LED flash for notifications can be useful for everyone. Although this special feature was designed primarily for the deaf and hard of hearing, anyone can use it to receive visual alerts.
When Do Not Disturb is active, this feature makes it easier to know when you receive a new notification. Personally, I like to use it to ensure I don't miss important messages even during my free time.
Help you enable "LED Flash for Alerts" in iOS 13 on your iPhone.
How to turn on the LED indicator on iPhone
With iOS 13, Apple has tweaked the Accessibility settings a bit. For a change, it now has its own section and is no longer part of the general category. Considering how convenient this feature is, this is a welcome move.
The move also shuffled the location of the LED flash. And that's why I thought that many Apple customers might be a little confused about the process of turning on LED notifications on the iPhone.
1. Launch settings application on your device and select availability,

2. Under the Audio section, click on Audio/Visual option,

3. In the Visual section, turn on the switch next to LED flash for alerts. Next, another switch will appear "Flash Without Sound". If you want a visual notification indicator even when your iPhone is silent, be sure to leave this switch turned on.

Going forward, you will receive visual notifications on your iPhone. Later, if you ever want to turn off the flashlight alerts, all you have to do is go back to the same settings and then turn off the LED flash toggle at the end.
Setting Up Flash Light Notifications on Your iPhone...
So, this is a quick way to enable flashlight alerts on iOS 13. Even though it's a fairly simple feature that may not be on everyone's favorite list, it's one I've loved using for years.
I just found it easier to stay in sync with the latest notifications so I didn't miss them even in Do Not Disturb mode. Do you also find this useful?
Max Borzov writes... January 28, 2012, 10:57 am. In this video you will see how to correctly glue the film onto the tablet. Our online store: http://www.metrobas.ru/? It is absolutely not necessary to pay money to have a specialist glue the film for you. This can be done without the help of others, at home
Video reviews and comparisons of gadgets
Home page » How to Paste Film on iPad Mini

Max Borzov writes...
How to properly apply film to an iPad
Similar articles
In this video you will see how true glue the film to the tablet. Our online store: http://www.metrobas.ru/?
It is absolutely not necessary to pay money to have a specialist glue the film for you. This can be done independently, at home, more efficiently and without any particular difficulties.
Let's look at the example of an iPad, which I just covered yesterday evening. The iPad has a fairly large screen, and although scratching the iPad screen is difficult, it can still happen. Specifically to protect the monitor from scratches, a protective film exists and is applied. In addition, with a protective film, there are practically no fingerprints left on the display. The film will keep the screen looking new even after long-term use.
First, let's prepare the conditions for gluing the film. If you have ever tried to glue film, you have probably encountered the main problem - specks of dust and specks that somehow somehow unknown and instantly get onto the screen, as a result, dots and bubbles remain on the film. It’s easy to get rid of them: we buy a monitor cleaning product with antistatic properties at any computer store and, taking the film and accessory, we go to the bathroom, where we turn on the shower with hot water for 5-7 minutes. Warm steam will help free the air in the room from dust, and for additional security, completely clean the surface of the screen with an antistatic agent.
Similar articles
How to properly apply film to an iPad
In this video you will see how to correctly glue the film to the tablet. Our online store:
How to stick a film on an iPad mini and more
Installation details films to the display iPad mini How does the back of a mini with a silver body get scratched, how can…
Similar articles
Just before sticking the film, carefully apply it to the screen, plan how and in what direction you will begin to remove the protective layer. When you're ready to check the screen surface again for dust, even the smallest specks need to be removed!
Paste film evenly, removing the layer of protection evenly. If you miscalculated slightly and see that the process has gone wrong, feel free to peel it off and apply it correctly. The main thing is not to touch the screen and the adhesive surface with your fingers and make sure there is no dust on the display. Do everything carefully and slowly, make sure that the film does not go beyond the boundaries of the screen, if you leave it like that, after a day it will either look like it will “collect” a bunch of garbage under the glass.
When the film is glued, there will probably be a lot of bubbles on the display. Nothing terrible! We take any plastic card (often a special flexible scraper is included with the film) and gently begin to smooth out the bubbles, pushing them with the edge of the card towards the edges of the film. A few minutes and you're done!
I put film on all my devices and it has repeatedly saved them from damage. You shouldn’t take the cheapest film, it will quickly fall off or it will collect all the prints and you will be tortured to wipe the screen. At the moment I have a glossy SGP film on both iPhones and iPads, I’m very pleased with it. Well, the film comes with everything you need to apply it at home.
Does yours support the function?iPad?
The feature only works on iPad with iOS 11 and LED flash. Here are all supported models: iPad Pro 9.7, iPad Pro 10.5, iPad Pro 12.9 (both generations).
Older models (including iPad Air and iPad Air 2) and iPad mini do not have LED flash, so they do not support this feature.
How turn on flashlight oniPad
Step 1: On the Home screen or app, swipe up from the bottom of the screen to the center to open the new app switcher. In it you will find a new control center on the right side of the screen.
Step 2: Find the flashlight button and press it. An animation will appear and the button color will change. The tiny switch on the icon will move - a nice little detail.

Step 3: Previously, you could adjust the flashlight intensity using 3D Touch. Now you can do this on iPad too. Hold down the flashlight button and a slider with four sections will appear. On it you can choose different levels of intensity.

Step 4: To turn off the flashlight, simply press its button again in the control center.
The flashlight can also be turned on from the lock screen, but it is not as convenient.

Can't find the button in the control center?
On iOS 11, the control center is customizable, and the flashlight is one of the buttons that can be removed or added. If you cannot find it in the control center, then it is simply disabled.
Many of us are addicted to iPhone photography, buy special lenses and install many applications for photo processing. But how to choose an interesting accessory from the huge variety of others on the market. Let's pay attention to the best representatives of photo accessories for iOS devices.
Set from Manfrotto
This set from Manfrotto is a KLYP+ case for iPhone 5/5s with LED flash and three interchangeable lenses (1.5x telephoto, 0.68x wide-angle and 0.28x fisheye). All together can now be purchased at a reduced price on the company’s website for 97 instead of 138 euros.
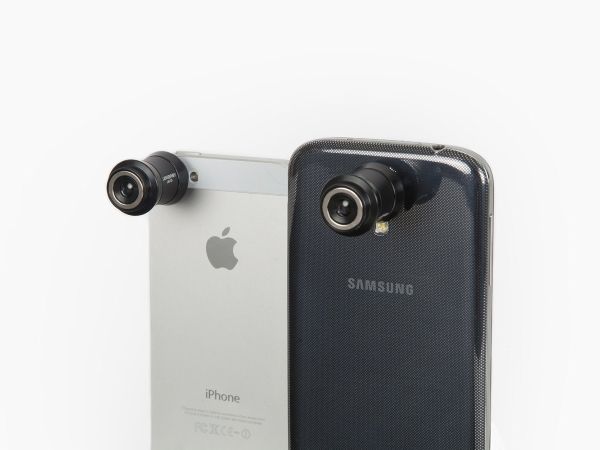
Lens from Lensbaby
Phocus Advanced Filmmaking Case
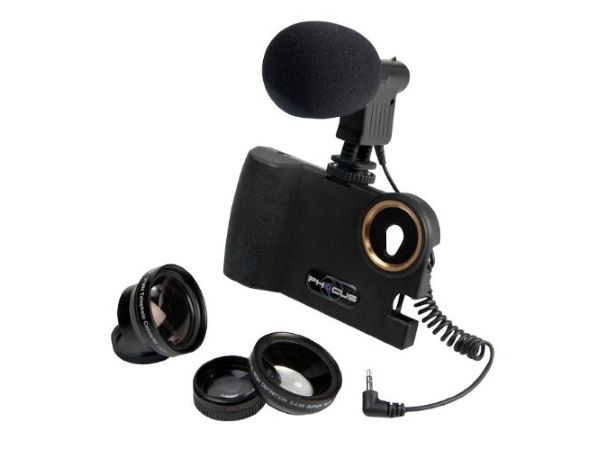
Phocus has come up with an interesting solution for those who are interested in video shooting on the iPhone. Their set consists of a convenient case, a microphone and three interchangeable lenses (telephoto, wide-angle and macro). The kit is suitable for iPhone 5 and costs 166 euros.
LED flash for iPhone 5
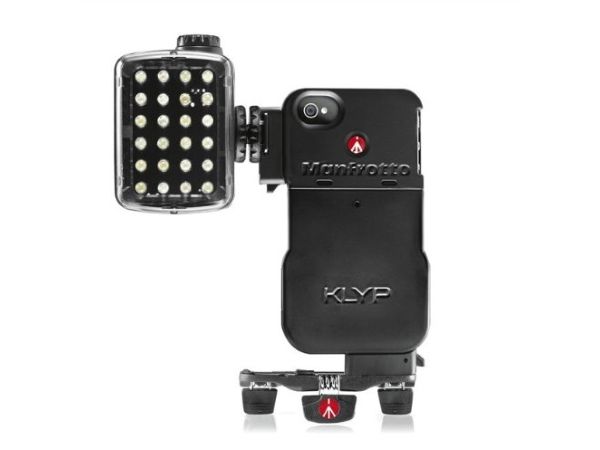
Another accessory from Manfrotto is currently on sale for 87 euros. The set consists of a KLYP iPhone 5 case, an ML240 flash with 24 LEDs and a small MP1-C01 tripod.
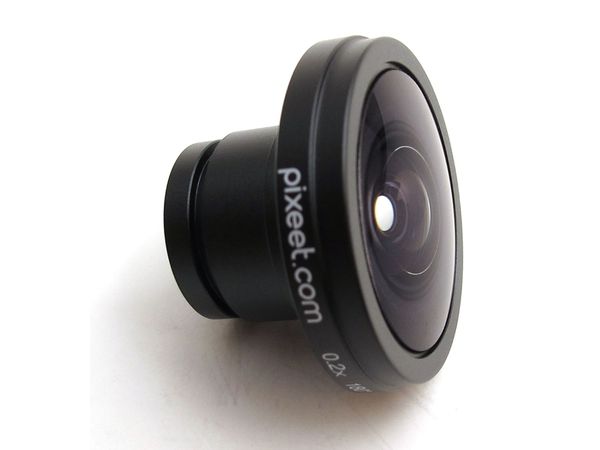
Lens for panoramic photos
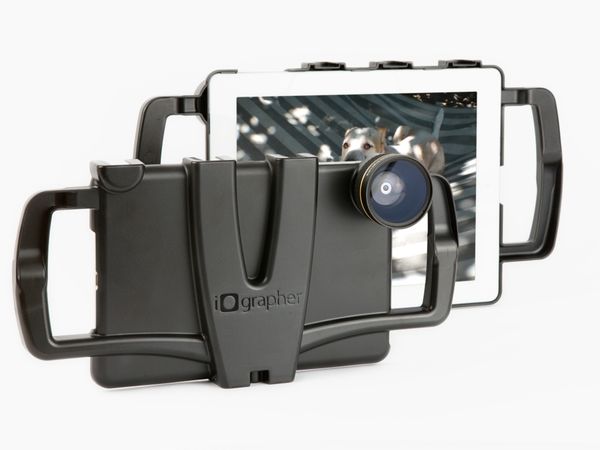
iOgrapher Photo Case
Lenses from Walimex
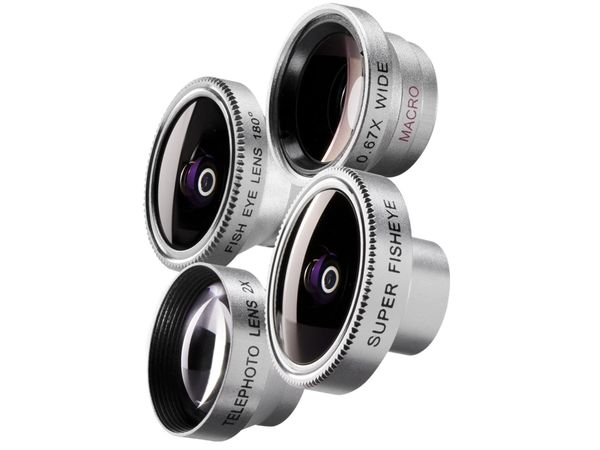
The South Korean company also presented its lens options for iPhone 4, 4s, 5. The set consists of fisheye, super fisheye, telephoto, wide-angle and macro, and costs 60 euros.
Olloclip lenses
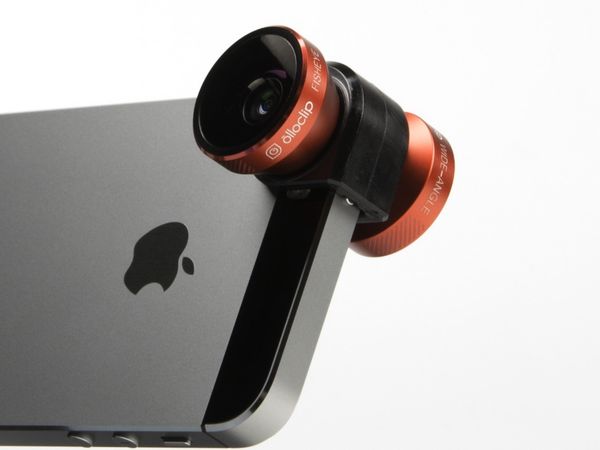
So far, Olloclip doesn’t have many real competitors. Over the several years of their existence, these lenses have proven themselves well among users and are now in great demand. The 4 in 1 set includes a fisheye, a wide-angle and two macro lenses 10x and 15x. The cost for iPhone 5/5s is $70, for iPhone 6/6 Plus — $80.
Telephoto lenses from Mofy
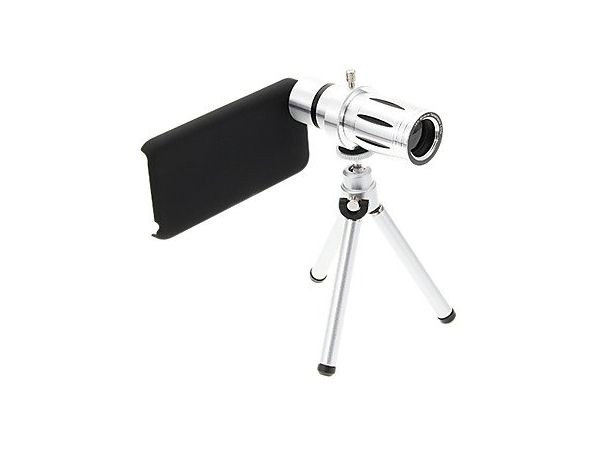
This accessory from Mofy is designed specifically for iPhone. The kit for the 4S model includes a case, a 6-18x telephoto lens and a small tripod. Its cost is 133 euros. The same goes for the iPhone 5c, only here you'll find a 12x telephoto lens. And it will cost you
There are often situations in life when you may need a flashlight. Carrying its pocket version with you is not very convenient. Fortunately, we live in the age of digital technology, everyone has smartphones and tablets, but even now not everyone knows about the presence of a flashlight on their gadgets and how to use it. Let's look at ways to turn the flashlight on and off on various Apple devices.
How to turn on the flashlight on iPhone and iPad
Before the iOS 7 firmware version, the iPhone did not have a built-in flashlight function, although even the black-and-white phones of the oldest models before the advent of the camera had a lighting device, for which they were loved by users.
Using the flashlight on Apple devices was almost impossible until the iPhone 4 with iOS 7. Software manufacturers took advantage of this. Some programs are still very popular in the market.
With the new version of the operating system, iPhone manufacturers have added a flashlight function directly to the control center of the device.
Just click on this icon and you will get a light source. Thanks to the diodes used for the iPhone flash, the brightness will not decrease even after prolonged use. The same, of course, cannot be said about the device’s battery.
There are two ways to turn off the flashlight:
Starting with iOS 10, users have the ability to choose the intensity of the flashlight. To do this, you need to hold down the icon to turn it on. In this case, there will be three types of intensity to choose from:
- low;
- average;
- high.
Video: how to turn on the flashlight on iPhone
Flashing flashlight for calls and SMS
You can make the flashlight blink as follows:
- Go to general settings and select “General”.
- Select "Universal Access".
- Go to the Flash Alerts menu.
Select the "Flash Alerts" menu
- Activate the necessary items: “Flash warnings” and/or “Flash in silent mode”.
Enable the required parameters by clicking on the appropriate buttons
In some versions of the operating system, the Alert Flash menu is itself a button.
Video: How to enable Alert Flash on iPhone
Flashlight programs for iOS
There are a large number of third-party programs that allow you to add a flashlight function to your device. Let's look at some of them.
Flashlight by Rick
A good utility for older versions of iPhone 4s, 5, 6. It has a very simple, intuitive interface and is easy to use.
"Flashlight for iPad, iPhone, iPod touch"
The current product version is 3.22. Compatible with devices running iOS 4.3 and higher. The program is free. Can use both the device display and LED flash. Has an intuitive interface.
"LED flashlight"
An application that differs from the rest in that the user can choose the backlight color if it is done through the device screen.
The user is also free to choose the brightness level, has the ability to switch to the backlight flashing mode and some other functions. Unfortunately, this program is quite resource-intensive and is not recommended for long-term use.
Publications on the topic
-
 How to reset an iPhone or iPad to factory settings Two-factor authentication how to bypass Apple
With the latest updates to the iOS operating system, users of Apple smartphones now have a useful feature that helps them store...
-
 How to take a screenshot on a computer or mobile device Screenshot on Android takes the photo upside down
Many people, when choosing a mobile phone, prefer the Android operating system. It is convenient in its simplicity. Even new...